Editing
Your Angle
You can edit your angle.
Of course, before you can edit an angle, you must be able to
create a basic angle. If you have not already
made a basic angle, look at that page first and
then come back and learn about editing�..
 How
to Edit any Angle How
to Edit any Angle
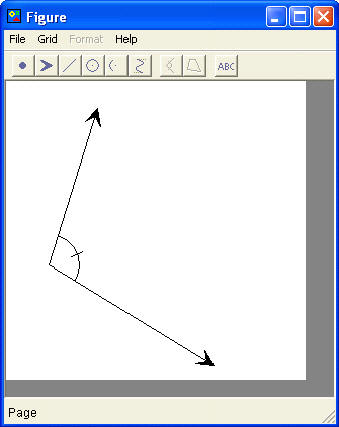
Once you have created an angle, all you have to do to edit it is Double
Click on it. When you do, the Figure Editor box with your angle will
open up again.
You can change the location and size of your angle easily. Simply Click
and Drag the arrows around the screen until you have the angle you
want.
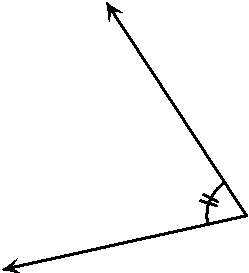
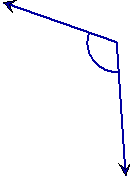 Create
Edited Angle #1 Create
Edited Angle #1
In this angle we changed the color, changed the angle style, and made the
arrows smaller.
Create your Basic Angle
Double Click on the angle to open the figure
box
| Click
and drag the arrows and the vertex until you have repositioned the
angle. .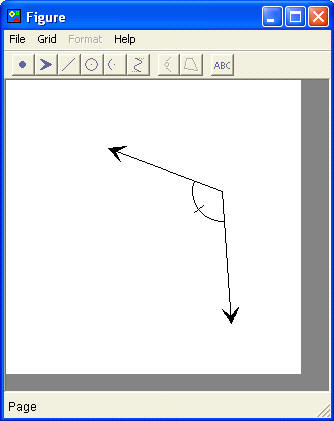 |
Click
on the angle to highlight it. Then Right Click on the angle and
select Angle Style and choose Arcs.
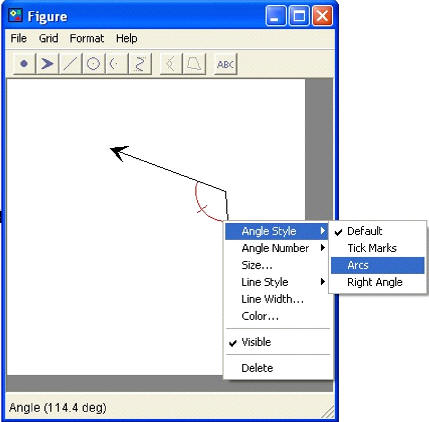 |
| Click
on an arrow to select it. Right Click and select Size.
The size box will appear. Type in 6. Repeat with the other
arrow
 |
For each
part of your figure. Click on it to highlight it. Right
Click and select Color. The color box will appear.
Select the color you want.
 |
| You can make
the lines and angle thicker by selecting them, Right Clicking
on them, and then selecting Line Width. In the Line
width box type 2. |
 |
Now you have your edited angle. Click on the
 in the top
right hand corner of the Figure Editor box to close the editor and your
angle will appear on the composer screen. in the top
right hand corner of the Figure Editor box to close the editor and your
angle will appear on the composer screen.
 Now
feel free to click and drag your number line anywhere on the page
you need it. Now
feel free to click and drag your number line anywhere on the page
you need it.
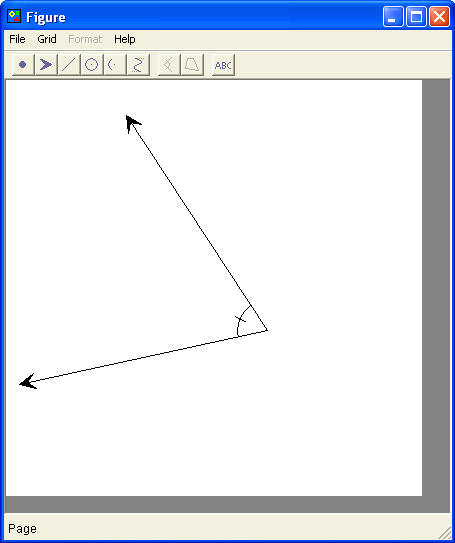
Create
Edited Angle#2
 In
this angle we changed the line thickness and changed the number of tick
marks on the angle In
this angle we changed the line thickness and changed the number of tick
marks on the angle
Create your
Basic Angle
Double Click on the angle to open the figure box
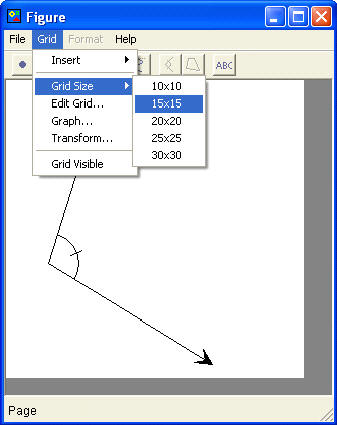
This
time the whole figure is a bit larger so we need a bigger canvas size.
To take care of this, select Grid Size from the Grid Menu
and then select 15 x 15
Click and drag the arrows and
the vertex until you have repositioned the angle.
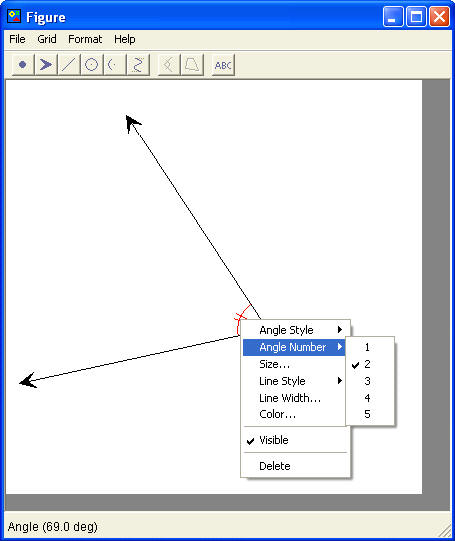
Click on the angle to highlight it.
Then Right Click on the angle and select Angle Number
and select 2.
Then Right Click on the angle again and select Size
and type 40 in the size box.
Then Right Click on the angle again and select Line Width
and type 3 in the line width box.
You can make the lines thicker by selecting them,
Right Clicking on them, and then selecting Line Width.
In the Line width box type 3
Now you have your edited angle. Click on the
in the top
right hand corner of the Figure Editor box to close the editor and your
angle will appear on the composer screen.
Now feel free to click and drag your number line anywhere on the page you
need it.
|