Create a
Basic Angle
 Here
are the steps to make a very basic angle. Here
are the steps to make a very basic angle.
 Open
the figure editor so you can start creating a new figure. Open
the figure editor so you can start creating a new figure.
Right click anywhere on the Composer Screen.
Point to Insert
Click on Figure
A new window with the figure editor opens.
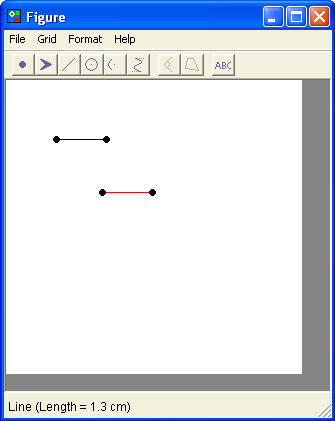
Create and attach two
lines to form an angle.
In the figure editor, Click on the line button on the figure
editor toolbar and a line will appear.

We need two lines, so Click on the line button a second time on
the figure editor toolbar and another line will appear.
NOTE: Every time you click on a button on the toolbar to add a
line, point, circle, arc, or arrow, the item is added to the figure
box in the same spot in the upper left hand corner. So even though you
just clicked twice on the line button to add two lines it only looks
like there is one, because they are currently right on top of each
other. |
 |
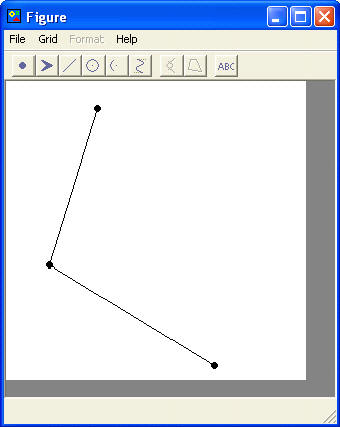
Now we will arrange the
lines to form an angle.
First click and drag the top line to somewhere
else in the figure editor so we can see both lines.
 |
Click and Drag
the Points of one of the lines until it is in the position you want.
 |
| Click and Drag
one Point of the second line over a point of the first line until you
see a blue highlighted circle appear. Then release the point and the
two endpoints will be attached.
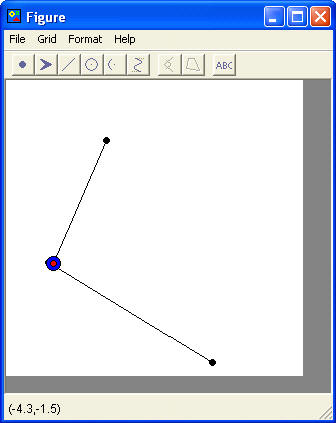 |
Click and Drag
the final Point of the second line until you have the angle you want.
 |
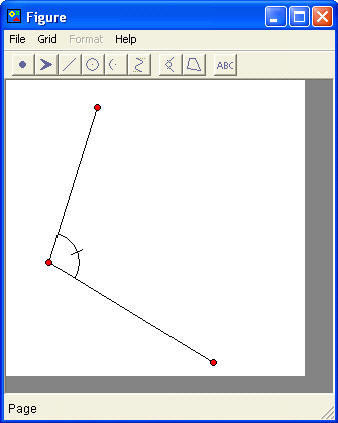
Now, Click on any
blank area of the Figure Editor to deselect everything. Now we need to
select the points of our angle. To do this, hold down
the CTRL key while clicking on the three points
that will define our angle. (Make sure you click on them in order with
the vertex being the second point selected).
All three points should be highlighted.
Click on the Angle button in the Figure Editor toolbar to create the
angle.
 |
 |
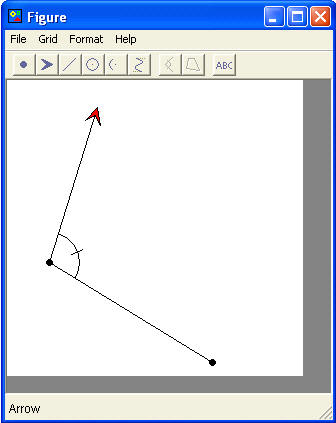
| Add arrows to your
angle Click on the Arrow button in the
Figure Editor toolbar and an arrow will appear.

Click and Drag the arrow over one of the endpoints until you
see a blue highlighted circle appear. Then release the arrow it
will attach to the point.
Repeat the process to add an arrow to the other endpoint.
Note: Sometimes the arrow merges in the opposite direction you want.
When this happens, click on the arrow to select it. Then Right
Click the arrow and choose Reverse Direction.
Make the vertex point Invisible.
Select the vertex by clicking on it to highlight it.
Right Click on the point and Select Visible.
The point will disappear.
|
 |
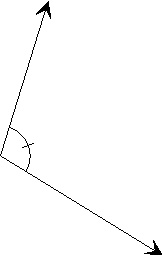
 Now
you have an angle. Click on the Now
you have an angle. Click on the
 in the top
right hand corner of the Figure Editor box to close the editor and your
angle will appear on the composer screen. in the top
right hand corner of the Figure Editor box to close the editor and your
angle will appear on the composer screen.
Now feel free to click and drag your number line anywhere on the
page you need it.
Any questions about the directions above or a specific kind of angle you
want to make? If so, go to our support page
and let us know. |