|
Aligning Objects on the Page When you
are making worksheets or tests you most often have multiple questions on
each page. You have the freedom to simply click and drag any object to
arrange it precisely where you want it on the page. In some cases you may
want to align all your objects so they are lined up, look neat and
organized, and look professional.
This is not a problem. There is an invisible alignment grid built into the
Composer Screen. If you set your objects (equations, text, figures,
graphs, etc.) to Align, they will only move at the increments specified in
the alignment grid�s settings.
Below is an example. For each of the objects you want to align to the
grid:
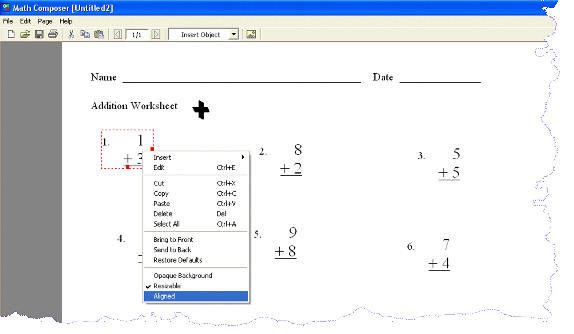
Select the object by clicking on it.
Right Click on the Object and select Align.
Click and Drag objects and you will see it only moves in set
increments across the screen.
Change your mind? Did you set an object to align to the grid and then
decide that isn�t what you wanted? No problem. Select the object by
clicking on it. Right Click on the Object and select Align
again. The check mark next to Align will disappear and your object is no
longer aligned to the grid.
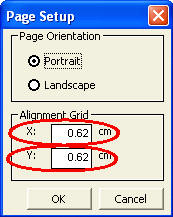
 Set
the specifications of the alignment grid. To set the measurements of the
alignment grid, from the File Menu, select Page Setup. The
Page Setup box will open. Fill in your desired settings in the boxes in
the Alignment Grid section. Set
the specifications of the alignment grid. To set the measurements of the
alignment grid, from the File Menu, select Page Setup. The
Page Setup box will open. Fill in your desired settings in the boxes in
the Alignment Grid section.
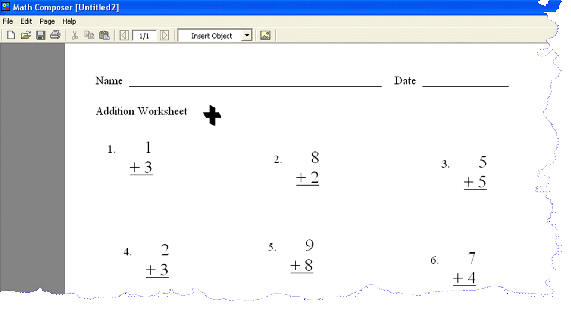
Example of Aligning objects:
Before alignment:

Select each object and align:

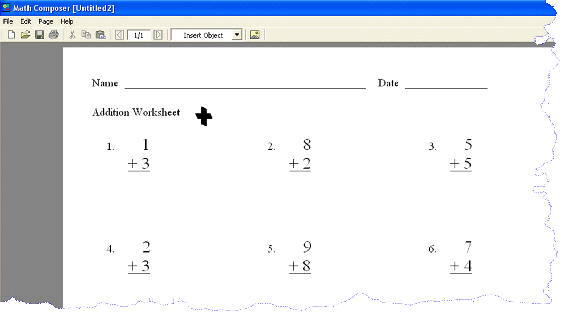
All objects aligned:

|
 Set
the specifications of the alignment grid. To set the measurements of the
alignment grid, from the File Menu, select Page Setup. The
Page Setup box will open. Fill in your desired settings in the boxes in
the Alignment Grid section.

